Watermarking a PDF is one of those tasks that looks simple at first, then quickly turns into “how do I make it centered, rotated, reusable, and not blurry?” The good news is that Python has excellent tools for this job. The most practical approach is usually to create a watermark page first, then merge it into the target PDF. With pypdf, a watermark can be placed behind page content by using over=False, while over=True makes it behave like a stamp on top of the page. If you need rotation, scaling, or translation, pypdf also supports transformed merging. ReportLab gives you the drawing tools to build the watermark page itself, and PyMuPDF can write text, images, or even another PDF page directly onto an existing page.
This article shows both text watermarking and image watermarking in Python, with examples that work well for real projects. You will see three workflows: create a watermark PDF with ReportLab and merge it with pypdf, add watermark content directly with PyMuPDF, and handle special cases like only watermarking some pages or making the watermark diagonal. Along the way, the examples stay practical so you can copy them into your own project and adapt them quickly.
What a watermark should do
A good watermark usually has four jobs. It should be visible enough to protect the document, subtle enough not to destroy readability, repeatable across all pages, and easy to change later. For internal documents, the watermark might say “DRAFT” or “CONFIDENTIAL.” For images placed into a PDF, the watermark might be a logo, a website name, or a copyright mark. The trick is to keep the watermark as a separate layer instead of baking it into the original content. That way you can reuse the same watermark on many documents without manually editing each page. The tooling below is built around that idea.
The libraries we will use
For this guide, the safest and most flexible stack is:
ReportLab to generate the watermark PDF page.
pypdf to merge that watermark page onto existing PDFs.
PyMuPDF as an alternative when you want to write directly onto pages with more layout control.
ReportLab’s canvas supports drawing text with drawString, drawCentredString, and drawRightString, placing images with drawImage, and managing transform/state with rotate, saveState, and restoreState. PyMuPDF can insert text, insert images, and overlay an existing PDF page with show_pdf_page(). pypdf can merge another page onto each page of the source document, and its documentation explicitly describes the difference between watermarking and stamping. (docs.reportlab.com)
Install the packages
pip install pypdf reportlab pymupdf pillowYou need pypdf for merging PDF pages, reportlab for drawing watermark pages, pymupdf for direct page editing, and pillow for image handling when preparing image-based watermarks. The ReportLab documentation notes that image drawing is part of its PDF canvas workflow, and pypdf’s watermark guide also shows a path for turning images into PDF pages before merging them.
Method 1: Create a text watermark PDF and merge it with pypdf
This is the most common and reliable solution. First you create a one-page PDF containing the watermark text. Then you merge that watermark page into every page of the target PDF. That separation is important because the watermark page can be reused on any document, in any project, without redrawing it each time. pypdf’s documentation recommends exactly this kind of page merging, and it distinguishes background watermarking from foreground stamping with the over parameter.
Step 1: build the watermark page
from reportlab.pdfgen import canvas
from reportlab.lib.pagesizes import A4
from reportlab.lib.units import mm

def create_text_watermark_pdf(
    output_path: str,
    text: str = "CONFIDENTIAL",
    page_size=A4,
    font_name: str = "Helvetica-Bold",
    font_size: int = 60,
    angle: int = 45,
):
    width, height = page_size
    c = canvas.Canvas(output_path, pagesize=page_size)

    # Save the current graphics state so rotation and color do not leak.
    c.saveState()

    # Move origin to the center of the page.
    c.translate(width / 2, height / 2)
    c.rotate(angle)

    # A light gray watermark is often enough without needing transparency.
    c.setFillGray(0.85)
    c.setFont(font_name, font_size)

    # Draw centered text at the new origin.
    c.drawCentredString(0, 0, text)

    c.restoreState()
    c.showPage()
    c.save()
This works because ReportLab’s canvas supports font changes, color changes, rotation, and centered text drawing. Its docs also explain that saveState() and restoreState() are the right way to temporarily change canvas settings and then return to the previous drawing state.
Step 2: merge the watermark into a PDF
from pypdf import PdfReader, PdfWriter

def add_text_watermark(
    input_pdf: str,
    watermark_pdf: str,
    output_pdf: str,
    underlay: bool = True,
):
    reader = PdfReader(input_pdf)
    watermark_page = PdfReader(watermark_pdf).pages[0]

    writer = PdfWriter()

    for page in reader.pages:
        # over=False means the watermark goes behind the page content.
        # over=True means it sits on top like a stamp.
        page.merge_page(watermark_page, over=not underlay)
        writer.add_page(page)

    with open(output_pdf, "wb") as f:
        writer.write(f)
pypdf documents this exact behavior: over=False places the content in the background, while over=True overlays it in front. If you do not need transformation, merge_page() is enough.
Example usage
create_text_watermark_pdf("watermark_text.pdf", text="DRAFT")
add_text_watermark("input.pdf", "watermark_text.pdf", "output_watermarked.pdf")
That is enough for many real projects. You get a reusable text watermark that can be placed on every page, and because it is a separate PDF page, the same watermark can be used on multiple documents.
Making the watermark diagonal, larger, or smaller
Sometimes a normal centered watermark is too subtle, or it lands in a place where it collides with the page layout. In those cases, a transformed merge is the better choice. pypdf’s watermark guide shows merge_transformed_page() with Transformation() for scaling, rotation, and translation.
from pypdf import PdfReader, PdfWriter, Transformation

def add_scaled_watermark(
    input_pdf: str,
    watermark_pdf: str,
    output_pdf: str,
    scale: float = 0.7,
):
    reader = PdfReader(input_pdf)
    watermark_page = PdfReader(watermark_pdf).pages[0]

    writer = PdfWriter()

    for page in reader.pages:
        # Scale the watermark before merging it.
        page.merge_transformed_page(
            watermark_page,
            Transformation().scale(scale),
        )
        writer.add_page(page)

    with open(output_pdf, "wb") as f:
        writer.write(f)
This is useful when the watermark PDF was designed at one size but needs to fit multiple page formats. The same approach can be extended to rotation and translation, which is exactly why pypdf includes merge_transformed_page() in its watermark documentation.
Watermark only some pages
Not every PDF should have a watermark on every page. You may only want it on the first page, or only on pages 2 through 5, or only on pages that contain sensitive content. That is easy to handle with page indexing.
from pypdf import PdfReader, PdfWriter

def add_watermark_to_selected_pages(
    input_pdf: str,
    watermark_pdf: str,
    output_pdf: str,
    selected_pages: set[int],
):
    reader = PdfReader(input_pdf)
    watermark_page = PdfReader(watermark_pdf).pages[0]
    writer = PdfWriter()

    for index, page in enumerate(reader.pages):
        if index in selected_pages:
            page.merge_page(watermark_page, over=False)
        writer.add_page(page)

    with open(output_pdf, "wb") as f:
        writer.write(f)
This pattern is simple but powerful. It lets you protect only the pages that need protection while leaving the rest untouched. The merge behavior comes from pypdf’s page stamping guide.
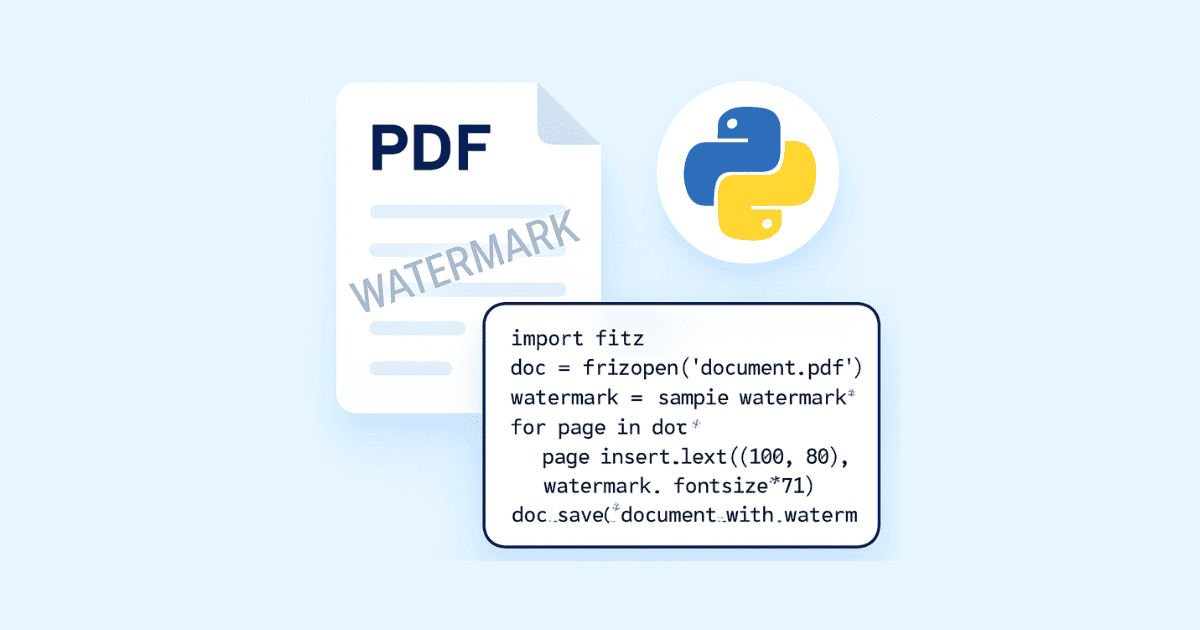
Method 2: Add a text watermark directly with PyMuPDF
PyMuPDF is a strong alternative when you want to write directly onto existing PDF pages instead of merging another PDF afterward. Its page API supports inserting text, images, and even other PDF pages, and the documentation shows that page content can be modified directly for PDF documents. It also notes that coordinates are based on the unrotated page and that the top-left corner is the origin in its coordinate system.
Text watermark with PyMuPDF
import fitz  # PyMuPDF

def add_text_watermark_pymupdf(
    input_pdf: str,
    output_pdf: str,
    text: str = "CONFIDENTIAL",
):
    doc = fitz.open(input_pdf)

    for page in doc:
        rect = page.rect
        fontsize = min(rect.width, rect.height) / 8

        # Insert the text diagonally across the page.
        page.insert_text(
            (rect.width * 0.15, rect.height * 0.55),
            text,
            fontsize=fontsize,
            fontname="helv",
            rotate=45,
            color=(0.8, 0.8, 0.8),
            overlay=True,
        )

    doc.save(output_pdf, garbage=4, deflate=True, clean=True)
    doc.close()
PyMuPDF documents insert_text() with an overlay parameter and rotate support, which makes this style of watermark straightforward. It also documents insert_textbox() for when you want to place text inside a rectangle rather than at a single point.
Why this is useful
This approach is excellent when you want to adjust the watermark position dynamically based on the page size, or when you need to place a short label exactly where you want it. Since PyMuPDF uses page rectangles and direct content insertion, it is often convenient for documents with many different page sizes. The docs also warn that coordinates are tied to the unrotated page, so it is worth using page.rect carefully when calculating positions.
Method 3: Add an image watermark
Image watermarks are often used for logos, icons, seals, signatures, and branded overlays. You can do this either by building a watermark PDF containing the image and merging it with pypdf, or by inserting the image directly with PyMuPDF. ReportLab’s drawImage() method is built for reusable image placement, and its docs describe it as the preferred method for drawing images on the canvas. PyMuPDF’s page API also supports insert_image(), and its show_pdf_page() method can display another PDF page without rasterizing it.
Option A: create an image watermark PDF with ReportLab
from reportlab.pdfgen import canvas
from reportlab.lib.pagesizes import A4
from PIL import Image

def create_image_watermark_pdf(
    image_path: str,
    output_path: str,
    page_size=A4,
    scale: float = 0.6,
):
    width, height = page_size
    c = canvas.Canvas(output_path, pagesize=page_size)

    img = Image.open(image_path)
    img_w, img_h = img.size
    aspect = img_h / img_w

    # Fit the image in the center of the page.
    target_w = width * scale
    target_h = target_w * aspect

    if target_h > height * scale:
        target_h = height * scale
        target_w = target_h / aspect

    x = (width - target_w) / 2
    y = (height - target_h) / 2

    c.drawImage(image_path, x, y, width=target_w, height=target_h, mask="auto")
    c.showPage()
    c.save()
ReportLab’s image docs explain that drawImage() is the preferred image API and that it supports caching, while mask="auto" can help with transparency handling when the image contains a transparent background.
Then merge it the same way as the text watermark:
from pypdf import PdfReader, PdfWriter

def add_image_watermark(
    input_pdf: str,
    watermark_pdf: str,
    output_pdf: str,
    underlay: bool = True,
):
    reader = PdfReader(input_pdf)
    watermark_page = PdfReader(watermark_pdf).pages[0]
    writer = PdfWriter()

    for page in reader.pages:
        page.merge_page(watermark_page, over=not underlay)
        writer.add_page(page)

    with open(output_pdf, "wb") as f:
        writer.write(f)
Option B: insert the image directly with PyMuPDF
import fitz

def add_image_watermark_pymupdf(
    input_pdf: str,
    output_pdf: str,
    image_path: str,
):
    doc = fitz.open(input_pdf)

    for page in doc:
        rect = page.rect
        w = rect.width * 0.5
        h = rect.height * 0.2
        x0 = (rect.width - w) / 2
        y0 = (rect.height - h) / 2
        r = fitz.Rect(x0, y0, x0 + w, y0 + h)

        page.insert_image(r, filename=image_path, overlay=True)

    doc.save(output_pdf, garbage=4, deflate=True, clean=True)
    doc.close()
PyMuPDF’s page API documents insert_image() for placing images and explains that show_pdf_page() is for displaying another PDF page without rasterizing it. That makes PyMuPDF a strong choice when you want to write image watermarks directly or reuse a page-shaped watermark object.
A complete reusable script
The next script is useful when you want one file that can create either a text watermark or an image watermark and then apply it to a PDF. It uses ReportLab to build the watermark page and pypdf to merge it into the target document. This is a clean pattern because the watermark can be regenerated with a different label at any time.
from pathlib import Path

from pypdf import PdfReader, PdfWriter
from reportlab.pdfgen import canvas
from reportlab.lib.pagesizes import A4
from PIL import Image


def build_text_watermark_pdf(
    output_pdf: str,
    text: str = "CONFIDENTIAL",
    page_size=A4,
    font_size: int = 60,
    angle: int = 45,
):
    width, height = page_size
    c = canvas.Canvas(output_pdf, pagesize=page_size)
    c.saveState()
    c.translate(width / 2, height / 2)
    c.rotate(angle)
    c.setFillGray(0.85)
    c.setFont("Helvetica-Bold", font_size)
    c.drawCentredString(0, 0, text)
    c.restoreState()
    c.showPage()
    c.save()


def build_image_watermark_pdf(
    image_path: str,
    output_pdf: str,
    page_size=A4,
    scale: float = 0.55,
):
    width, height = page_size
    c = canvas.Canvas(output_pdf, pagesize=page_size)

    img = Image.open(image_path)
    iw, ih = img.size
    aspect = ih / iw

    target_w = width * scale
    target_h = target_w * aspect

    if target_h > height * scale:
        target_h = height * scale
        target_w = target_h / aspect

    x = (width - target_w) / 2
    y = (height - target_h) / 2

    c.drawImage(image_path, x, y, width=target_w, height=target_h, mask="auto")
    c.showPage()
    c.save()


def apply_watermark(
    input_pdf: str,
    watermark_pdf: str,
    output_pdf: str,
    underlay: bool = True,
):
    reader = PdfReader(input_pdf)
    watermark_page = PdfReader(watermark_pdf).pages[0]

    writer = PdfWriter()

    for page in reader.pages:
        page.merge_page(watermark_page, over=not underlay)
        writer.add_page(page)

    with open(output_pdf, "wb") as f:
        writer.write(f)


if __name__ == "__main__":
    input_pdf = "input.pdf"
    output_pdf = "output_watermarked.pdf"

    build_text_watermark_pdf("wm_text.pdf", text="DRAFT")
    apply_watermark(input_pdf, "wm_text.pdf", output_pdf, underlay=True)

    # To use an image watermark instead:
    # build_image_watermark_pdf("logo.png", "wm_logo.pdf")
    # apply_watermark(input_pdf, "wm_logo.pdf", output_pdf, underlay=True)
This single script is enough for many everyday PDF workflows. You can swap the watermark text, change the image, scale it up or down, or place it under the content rather than above it. That flexibility is exactly what pypdf’s watermark merge model is designed for.
A more advanced approach with PyMuPDF and another PDF page
Sometimes you already have a watermark saved as a PDF, and you want to reuse that page directly. PyMuPDF’s show_pdf_page() is ideal for this because it shows another PDF page on the current one without rasterizing it. That is especially useful if the watermark is a vector logo or a design that needs to stay sharp at any zoom level.
import fitz

def overlay_pdf_watermark(
    input_pdf: str,
    watermark_pdf: str,
    output_pdf: str,
):
    src = fitz.open(watermark_pdf)
    doc = fitz.open(input_pdf)

    for page in doc:
        page.show_pdf_page(page.rect, src, 0, overlay=True)

    doc.save(output_pdf, garbage=4, deflate=True, clean=True)
    doc.close()
    src.close()
PyMuPDF documents this method as a way to display one PDF page on another page, and it explicitly notes that the source page is not rasterized. That makes it a very good fit for logos, letterheads, and page-sized overlays.
Which method should you choose?
If your goal is simple background watermarking across many PDFs, pypdf plus ReportLab is the most straightforward option. It is easy to reason about, easy to reuse, and it keeps the watermark separate from the original pages. If your goal is to position text or images with pixel-like control inside an existing PDF, PyMuPDF is often more convenient because it edits pages directly. pypdf’s docs are especially strong for page merging and transformed stamps, while PyMuPDF’s docs are strong for direct page content insertion.
A practical rule is this: use pypdf when you already have or can generate a watermark page, and use PyMuPDF when you want to alter a PDF page in place with more layout control. Both are legitimate; they simply solve the same problem from different angles.
Common problems and how to fix them
The first common issue is rotation. If a watermark appears sideways or upside down, pypdf’s watermark guide suggests using transformation methods and, when needed, fixing page rotation with transfer_rotation_to_content() before merging. That is a strong hint that page geometry matters a lot during stamping.
The second common issue is page size mismatch. Watermarks created for A4 may not fit Letter or custom formats perfectly. That is why centered watermark pages and transformation-based merging are so helpful. They let you scale or reposition the watermark without rebuilding the original document.
The third common issue is image quality. If the watermark looks blurry, it is usually because a raster image was scaled too aggressively. In that case, a PDF-based watermark or a vector logo is better. PyMuPDF’s show_pdf_page() keeps the source page as PDF content rather than rasterizing it, which helps preserve sharpness.
The fourth common issue is text placement. In PyMuPDF, coordinates are based on the unrotated page, and the origin is at the top-left. That is different from the standard PDF bottom-left mental model many people have, so it is worth being careful when computing coordinates.
A production-friendly workflow
For real projects, I recommend this workflow:
First, decide whether the watermark is text or image. Then create it as a reusable asset, preferably as a PDF page. After that, merge it into the target document with pypdf or overlay it directly with PyMuPDF. Finally, save to a new file rather than overwriting the original. That keeps the source document safe and makes debugging much easier. This workflow aligns with the way both pypdf and PyMuPDF document page merging and page content insertion.
Final example: watermark everything with one command
Here is a compact version you could adapt into a script or a backend route:
import sys
from pypdf import PdfReader, PdfWriter
from reportlab.pdfgen import canvas
from reportlab.lib.pagesizes import A4


def create_watermark(path: str, text: str = "CONFIDENTIAL"):
    width, height = A4
    c = canvas.Canvas(path, pagesize=A4)
    c.saveState()
    c.translate(width / 2, height / 2)
    c.rotate(45)
    c.setFillGray(0.85)
    c.setFont("Helvetica-Bold", 64)
    c.drawCentredString(0, 0, text)
    c.restoreState()
    c.save()


def watermark_pdf(input_pdf: str, output_pdf: str, watermark_path: str):
    reader = PdfReader(input_pdf)
    wm = PdfReader(watermark_path).pages[0]
    writer = PdfWriter()

    for page in reader.pages:
        page.merge_page(wm, over=False)
        writer.add_page(page)

    with open(output_pdf, "wb") as f:
        writer.write(f)


if __name__ == "__main__":
    input_pdf = sys.argv[1]
    output_pdf = sys.argv[2]
    watermark_file = "wm.pdf"

    create_watermark(watermark_file, "DRAFT")
    watermark_pdf(input_pdf, output_pdf, watermark_file)
This version is intentionally small so it is easy to move into a Flask app, a Django view, a FastAPI endpoint, or a command-line tool. The same pattern also works for logos and other image-based watermarks once you replace the ReportLab text drawing with image drawing.
Conclusion
If you want the cleanest and most reusable solution, create the watermark as its own PDF page and merge it into the document with pypdf. If you want direct control over page content, use PyMuPDF. For text watermarks, ReportLab gives you centered text, rotation, and image placement. For image watermarks, both ReportLab and PyMuPDF work well, depending on whether you prefer page merging or direct editing. The important thing is to treat the watermark as a layer, not as a one-off edit. That keeps your workflow predictable, scalable, and easy to maintain.
If you want, I can turn this into an SEO-optimized version with meta title, meta description, and keywords.
Hassan Agmir
Author · Filenewer
Writing about file tools and automation at Filenewer.
Try It Free
Process your files right now
No account needed · Fast & secure · 100% free
Browse All Tools